

sourdough bread for dummies
how to bake good bread without losing your mind

I have been wanting to write this piece since starting this blog and quickly realized it’s too vast to be a single post. I have therefore decided to divide it up into 3 chapters. This is Chapter 1, which I envision as a starting point for anyone who wants to experiment with making sourdough bread (or those that need a nudge to start). I have tried to make the process outlined in this chapter be accessible and easy to adapt to your schedule, and only included essential pre-requisites for equipment you might need to invest in.
Chapter 2, is going to be an un-recipe of sorts - this is where I will delve into intuitive bread making, and developing your own starter. Chapter 3, is going to be all about discard, and how to use up the excess leftover starter you will inevitably produce.
Just like bread, bread making too is an ever-evolving process. So if you have questions, thoughts or opinions about aspects I should discuss further, please leave it in the comments. Thank you for reading!
give us this day, our daily bread
I’m not a religious person but if anything comes close to a religious experience for me, it’s bread. I LOVE bread. I have never met a bread I didn’t love - the snow white loaf of wonderbread, French baguettes and croissants, a ladi of pav, pretzels, homemade Indian rotis, Turkish Simit, Italian focaccia, Danish ryebread - I have tried them all. In fact, my favorite travel activity is to taste traditional bread preparations of the countries I visit - if i could, this would be my souvenir of choice. In fact, when my husband visited Montreal for the first time he had to drive back with - and declare to a very amused U.S. Customs Officer - that the only “food” he is carrying back is a singular plain bagel from St- Viateur Bagel, because his wife explicitly requested it.
I’m going to say something controversial: you haven’t had real bread until you’ve had sourdough.
Of the thousands of variations of bread, my favorite is the humble loaf of sourdough. Not only because it’s absolutely delicious, but also because of it’s simplicity. It is the perfect blank canvas - great as a base for toasts and sandwiches, but also on it’s own with some butter and sea salt. It tastes and smells like history, in a good way. Sourdough is the original leavened bread — born, so the story goes, when someone in Ancient Egypt left a porridge of wild wheat or barley out too long and found it bubbling the next morning. Instead of tossing it, they baked it, accidentally creating the world’s first bread.1 Even today the process of making sourdough has not changed significantly since Ancient Egypt, despite significant technological advancements in modern bread baking.
So when it came to baking my own bread, I knew in my heart that it had to be a loaf of sourdough.
the bad and the ugly
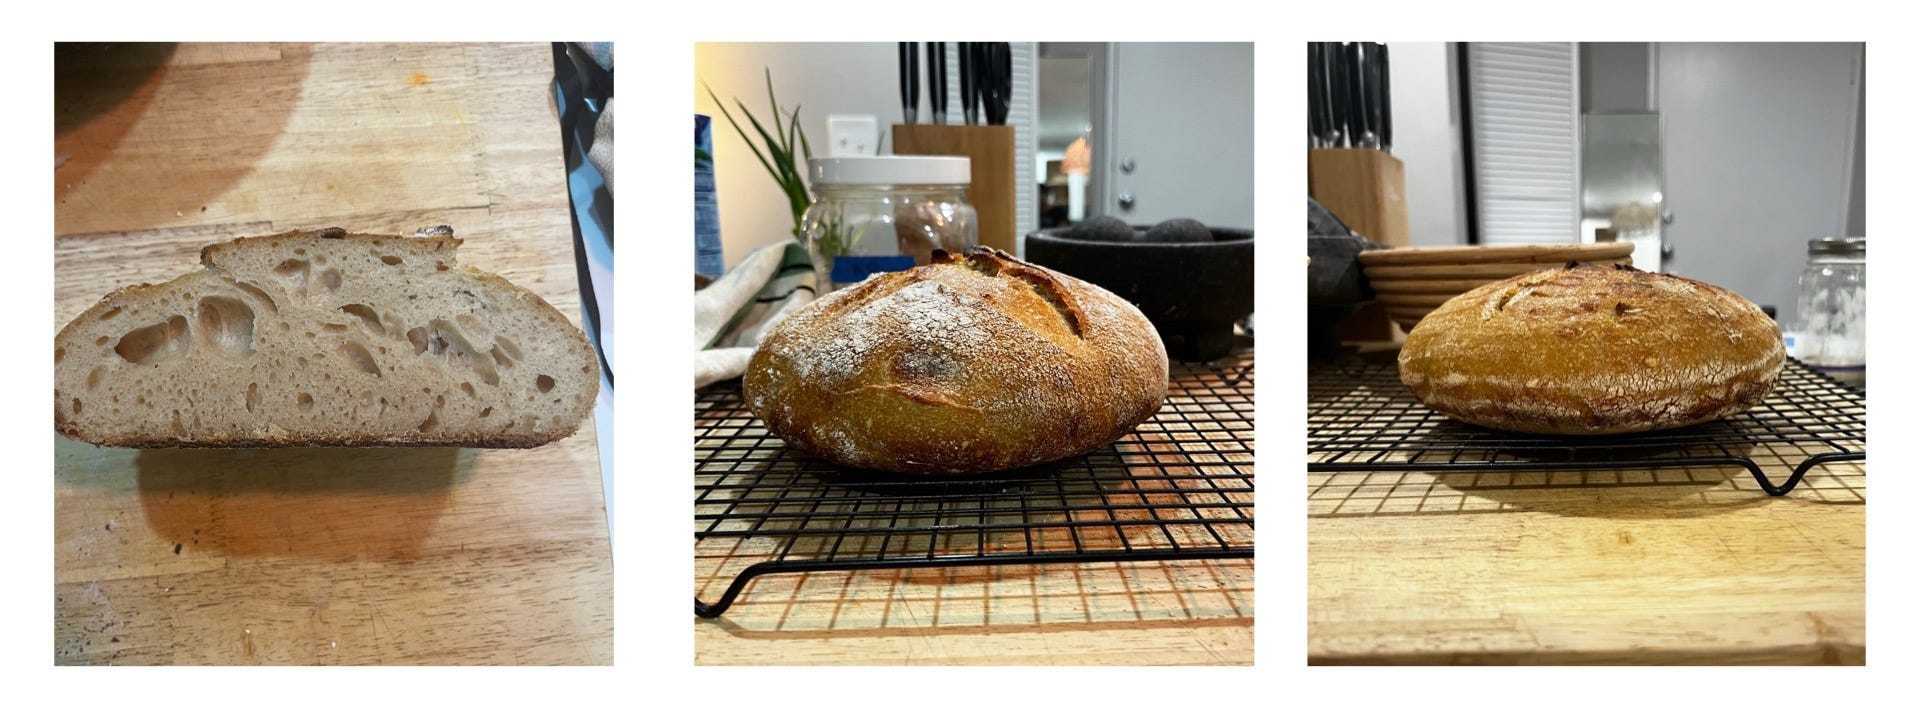
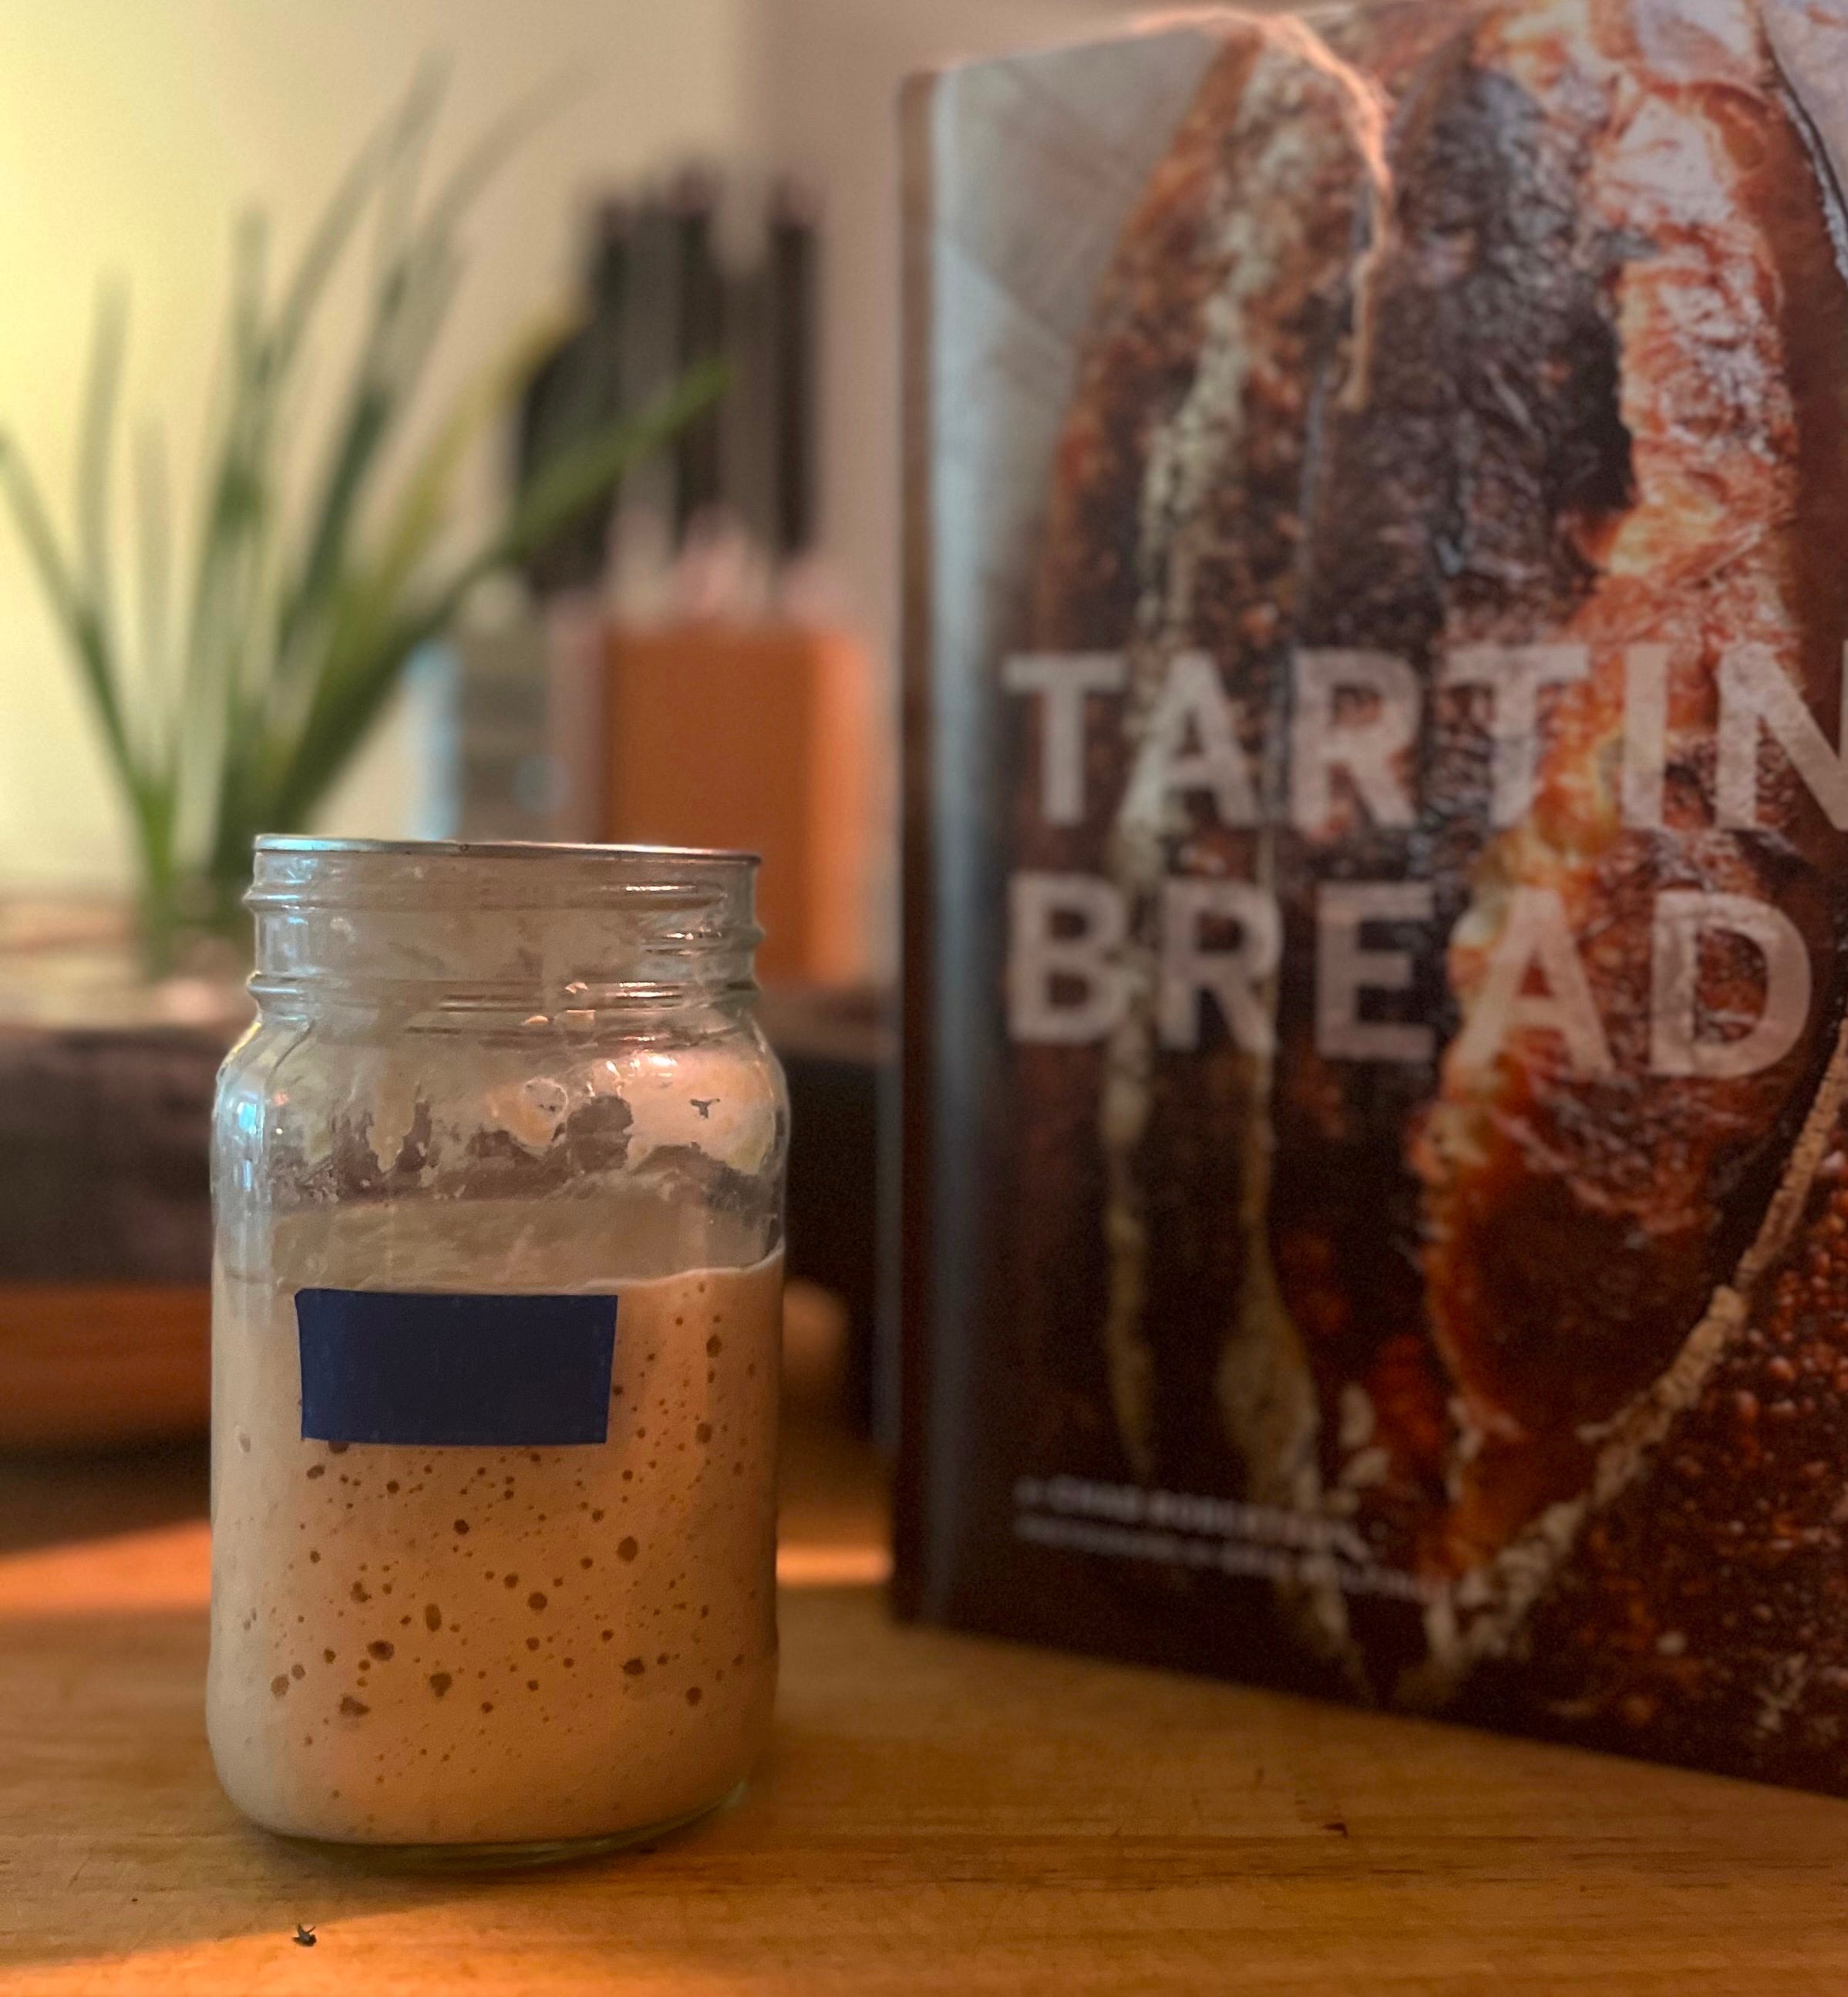
Today, after almost two years, I can whip up decent sourdough bread in two days time. But along the way there were many a bad loaves and ugly cries. My journey started like many other sourdough enthusiasts - armed with some flour, a copy of Tartine Bread,2 and eyes full of hopes and dreams. And like many beginners those hopes and dreams inevitably crashed and burned, when my first handful of loaves looked like this.
I then did, what any reasonable person would do - joined a Facebook group for sourdough beginners, where I posted my sad loaf along with a cry for help. This was a bad idea. While all the feedback on the group was well-intentioned, the advice was decidedly vague and often contradictory- your dough is overproofed, your dough is underproofed, your starter is weak, and so on. Not helpful for someone who, after staring at images of crumb structures for hours on end, couldn’t tell the difference between over and underproofed to save her life. In an attempt to troubleshoot the only way I knew how to, I started painstakingly collecting data about every measurable variable throughout the process of fermentation - temperature, volume, bubble size etc. My second post on the group was a table of hourly readings of each of these metrics. My hope was that some of the experts on the groups would be able to discern a reasonable hypothesis from all this data for why my loaves were flat as a plate. Then a well-meaning old lady commented, “This is not a science experiment, you’re making it harder than it needs to be.” That was the end of the Facebook group for me.
it’s never too late to starter over
When the dust had settled, and I’d regained some emotional composure, I began to look through my notes comparing them to what the recipe told me to expect and identified the problem - it was my starter. When I started making sourdough, I wanted to make my own starter just like the Ancient Egyptians did - mix a batch of flour and water, and let it naturally go bad collecting yeast and bacteria from the environment. While this approach worked at first, I was simply too impatient to give the starter enough time to mature into a stable culture. Effectively, I was expecting my weak, malnourished starter to run the equivalent of a microbial marathon without training. So for my second attempt, I did what the Egyptians couldn’t do, and bought myself a packet of dehydrated starter on Amazon and rehydrated it according to packet instructions. This new starter, christened Dough-by after Dobby the house elf, worked like a charm! After two years, Dough-by is still going strong having produced over a hundred loaves, and does not seem to be slowing down any time soon.
it’s bread time! extended recipe
bear minimum essentials for sourdough
This is the list of absolute essentials that you cannot bake bread without. I imagine a lot of you already have most of these things -
A kitchen oven3
Salt
Water
Mixing bowls
Glass or plastic containers for starter and leaven. I like to use a rubber band to track my starter’s growth
Kitchen knives or a blade
Parchment paper
Food scale or measuring cups - but really just buy a food scale. You will thank me.4
nice to haves
A banneton or two to give a nice shape and pattern to the loaf
Some good quality whole wheat or rye flour - great for adding flavor and nutrients
A reusable silicone bread mat to prevent sticking while baking
A lame - a fancy blade holder that lets you make pretty score patterns
a few disclaimers
For the purpose of this recipe I’m going to assume you have an established starter - you can either get this on amazon (like I did), from an established bakery that makes sourdough, or from another home baker. I will discuss making your starter from scratch in the next chapter.
I have included two equipments within essentials that most people don’t have in their kitchen - a food scale and a dutch oven. Although there are ways to go around these (see footnotes) I highly recommend buying them. I find they make a huge difference in the final outcome and have linked affordable options.
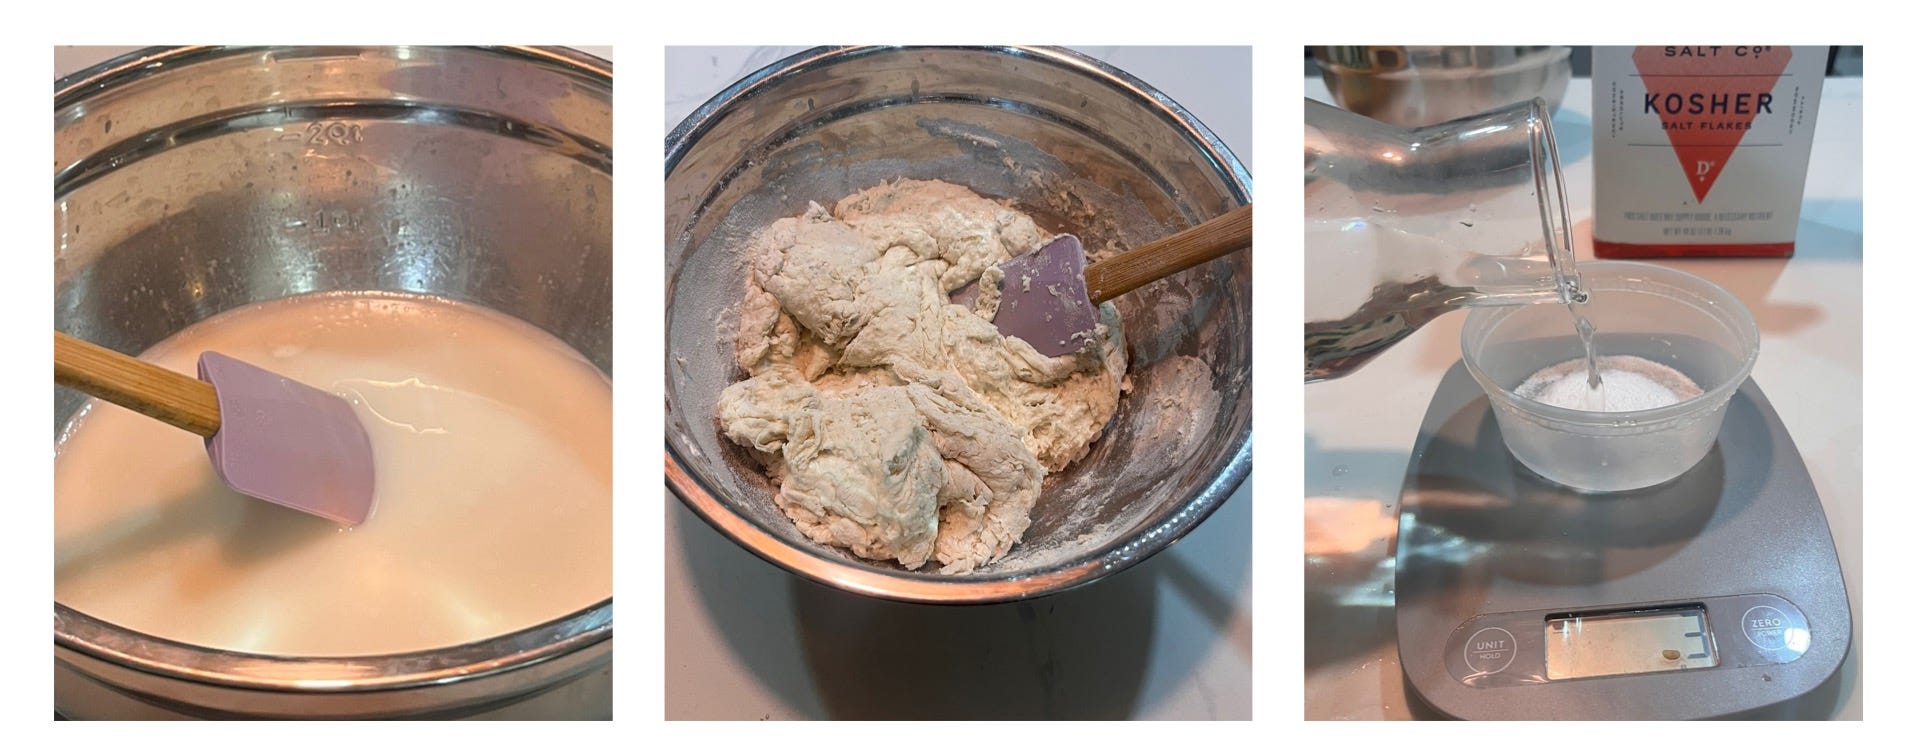
1. the leaven
It is confusing terminology, but I find it useful to distinguish between the starter and the leaven - The leaven is just a fancy name for the starter that actually goes into the bread dough as a source of the yeast. Assuming you already have a mature starter - I keep mine in the fridge - leaven is the most active, freshly fed version of that starter. To prepare the leaven, I take my starter out of the fridge and feed it in a 1:1:1 ratio -
30 g starter, 30 g flour and 30 g water OR 1/4 cup starter, 1/4 cup water and 1/4 cup flour
You want to mix in enough flour to achieve a thick batter-like consistency and then leave the mixture on the counter to double in volume. When it has doubled, you’re ready for step 2.
2. the autolyse
This is the mixing step, where all the components of the bread are mixed in together. Typically, bakers like to discuss ratios of ingredients in baker’s percentage where everything is calculated with respect to the total amount of flour - if you’re using 1000 g of flour and 750 g of water then the percentage of water is 75%, or your dough is 75% hydrated. My measurements (in g, cups and baker’s percentages are listed below).
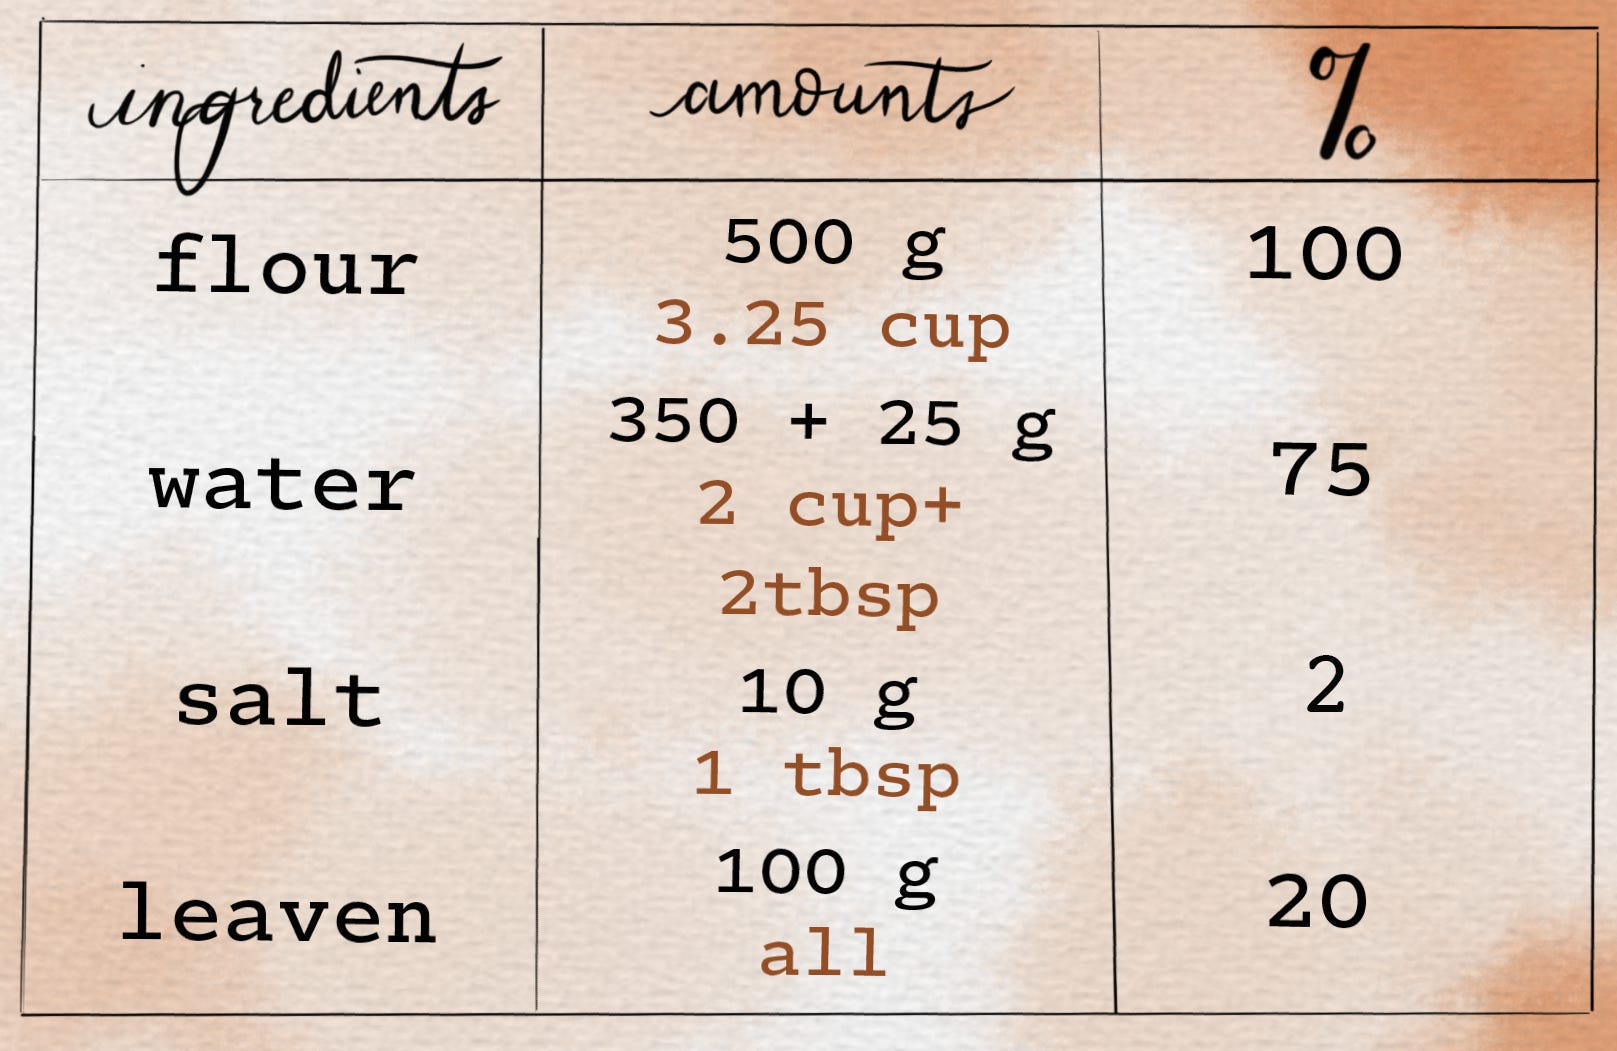
Typically, I start with all but 2 tbsps of the water in a large bowl and first add in all my leaven from step 1 (should be about 100 g) and dissolve this in the water. Once the leaven is mixed in, I add in all the flour and mix it in until it forms a shaggy dough. It will look like a dry mess, that is the idea. The process of autolysing is essentially to allow the flour to hydrate. Once all the flour is mixed in, I leave my dough to rest for 30 min to hydrate.
Notice how we didn’t add the salt? I actually wait until after the dough has autolysed to add my salt, along with the remaining 2 tbsp of water - this helps uniformly mix the salt into the bread.6
3. stretch-and-folds
This next part goes on for two hours and is the process of gluten development. All bread (unless it’s gluten-free) needs to be kneaded to organize the gluten protein strands into a network. This process transforms the bread from a wet mixture of flour to an actual ball of dough. Gluten is also critical to trap the carbon dioxide, produced by the yeast during fermentation, into the dough allowing it to rise in the oven and lead to the fluffy airy texture that we’re familiar with. Since sourdough is a high hydration dough (75% water), the process of kneading is slower and gentler as compared to other bread preparations.
Once you add in the salt and water in step 2, you begin the first stretch and fold. To do this lift up the dough from the center with both hands allowing gravity to stretch it as much as possible, then fold it over itself. Rotate the bowl by 90 degrees and repeat. Do this 4 times. This is one stretch-and-fold cycle. This will be repeated 3 more times in 30 min intervals. As you progress through the stretch and folds, you will notice that the dough naturally takes a spherical shape and is malleable but elastic.


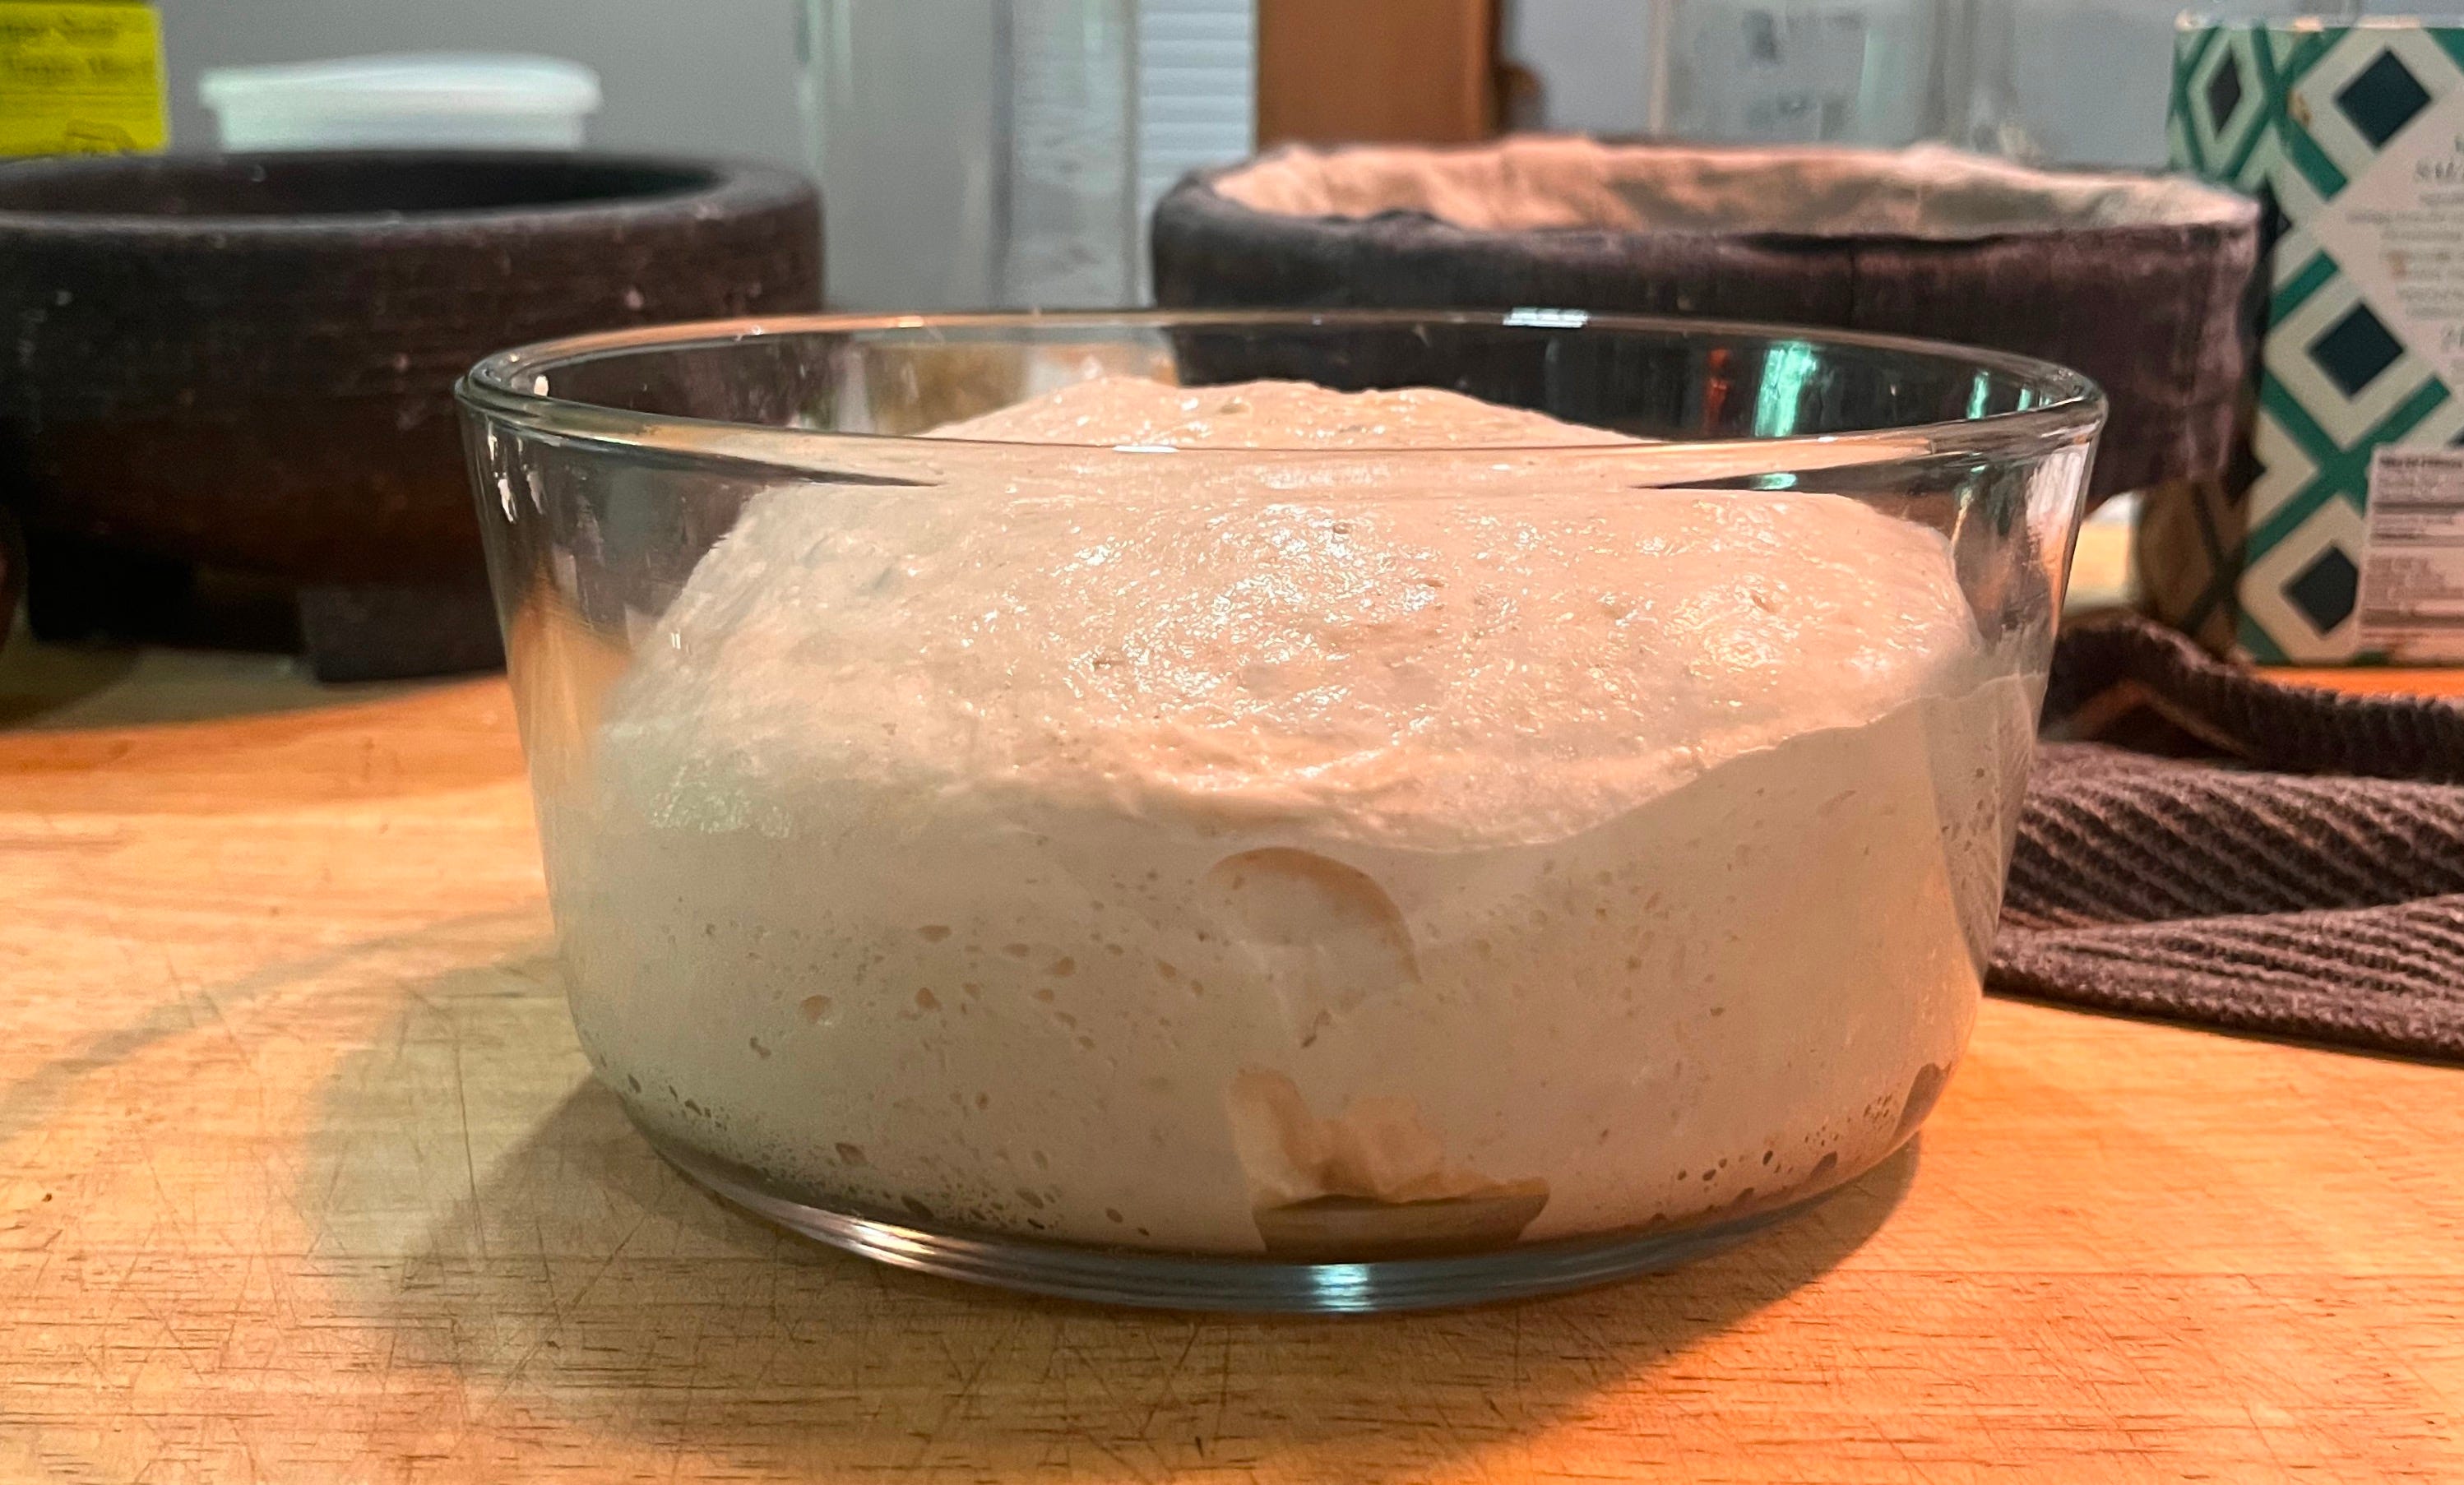
4. bulk fermentation
This is the step where the dough ferments - if that wasn’t obvious by the name itself. Bulk fermentation (BF) is when you finally allow the yeasts in the leaven to digest the sugars in the flour to produce carbon dioxide and flavor. Because sourdough used wild yeasts and bacteria, the process of fermentation is slower and takes about 2-3 hours, depending on the strength of your starter.
For this step, move your dough into a clean, preferably glass jar, and allow it to rest covered until it doubles in volume. I like to use a clear jar with straight walls so I can actually see the change in volume. Once the dough has doubled, you’re ready for the next step.
5. shaping
I like to divide the shaping itself into two steps - pre-shape and shape. Both steps are essentially the process of molding the dough into its final structure by organizing the gluten strands.
For the pre-shape, pour out the dough from the BF container onto the counter top and pull it into a large rectangle. Then fold each side of the rectangle about halfway, almost like your making an envelope. Once all four sides are folded, let the dough rest for 15 minutes.
For the shape, repeat the pre-shaping steps once more. Then flip the dough so the crease side is downwards and roll it into a ball shape either with your hands or with a dough scraper.


6. second fermentation
Once the dough is shaped, place the dough crease side up into a floured banneton or bowl with a kitchen towel and place in the fridge overnight. This is the second fermentation process or the rise where the yeast slowly ferments the dough. The cold temperatures and slow fermentation ensure that the dough develops its signature sour flavor. Although, you can do this for 2-4 hours at room temperature if you want to bake on the same day, giving it the overnight rest actually makes a huge difference to the flavor.
7. baking!
Pre-heat the oven to 450 F or the warmest you can get it to. This is crucial for breads. While the oven pre-heats, leave the dutch oven inside the oven so it gets warm.
In the meantime, place the dough on a parchment paper and score - this ensures the gases trapped inside the dough have a vent to escape through during baking. Improper scoring will lead to random cracks in the bread. Scoring also allows you to make the classic patterns that you see on artisinal loaves. For a basic score, using a knife, cut a long slit down the middle of the dough.
Place the scored dough inside the hot dutch oven, along with a couple of ice cubes to add steam, close the lid, and bake for 30 min. This ensures that the dough is trapped in it’s own steam and develops a well-cooked and crackly crust. This steaming process is basically why you need the dutch oven. See footnote 5 if you’re not using a dutch oven to mimic the steaming process.
After 30 min, remove the lid and bake for another 20 min or until the crust is golden brown. That’s it! Your bread is ready
Once the bread is fully cooled, you can slice it and eat!


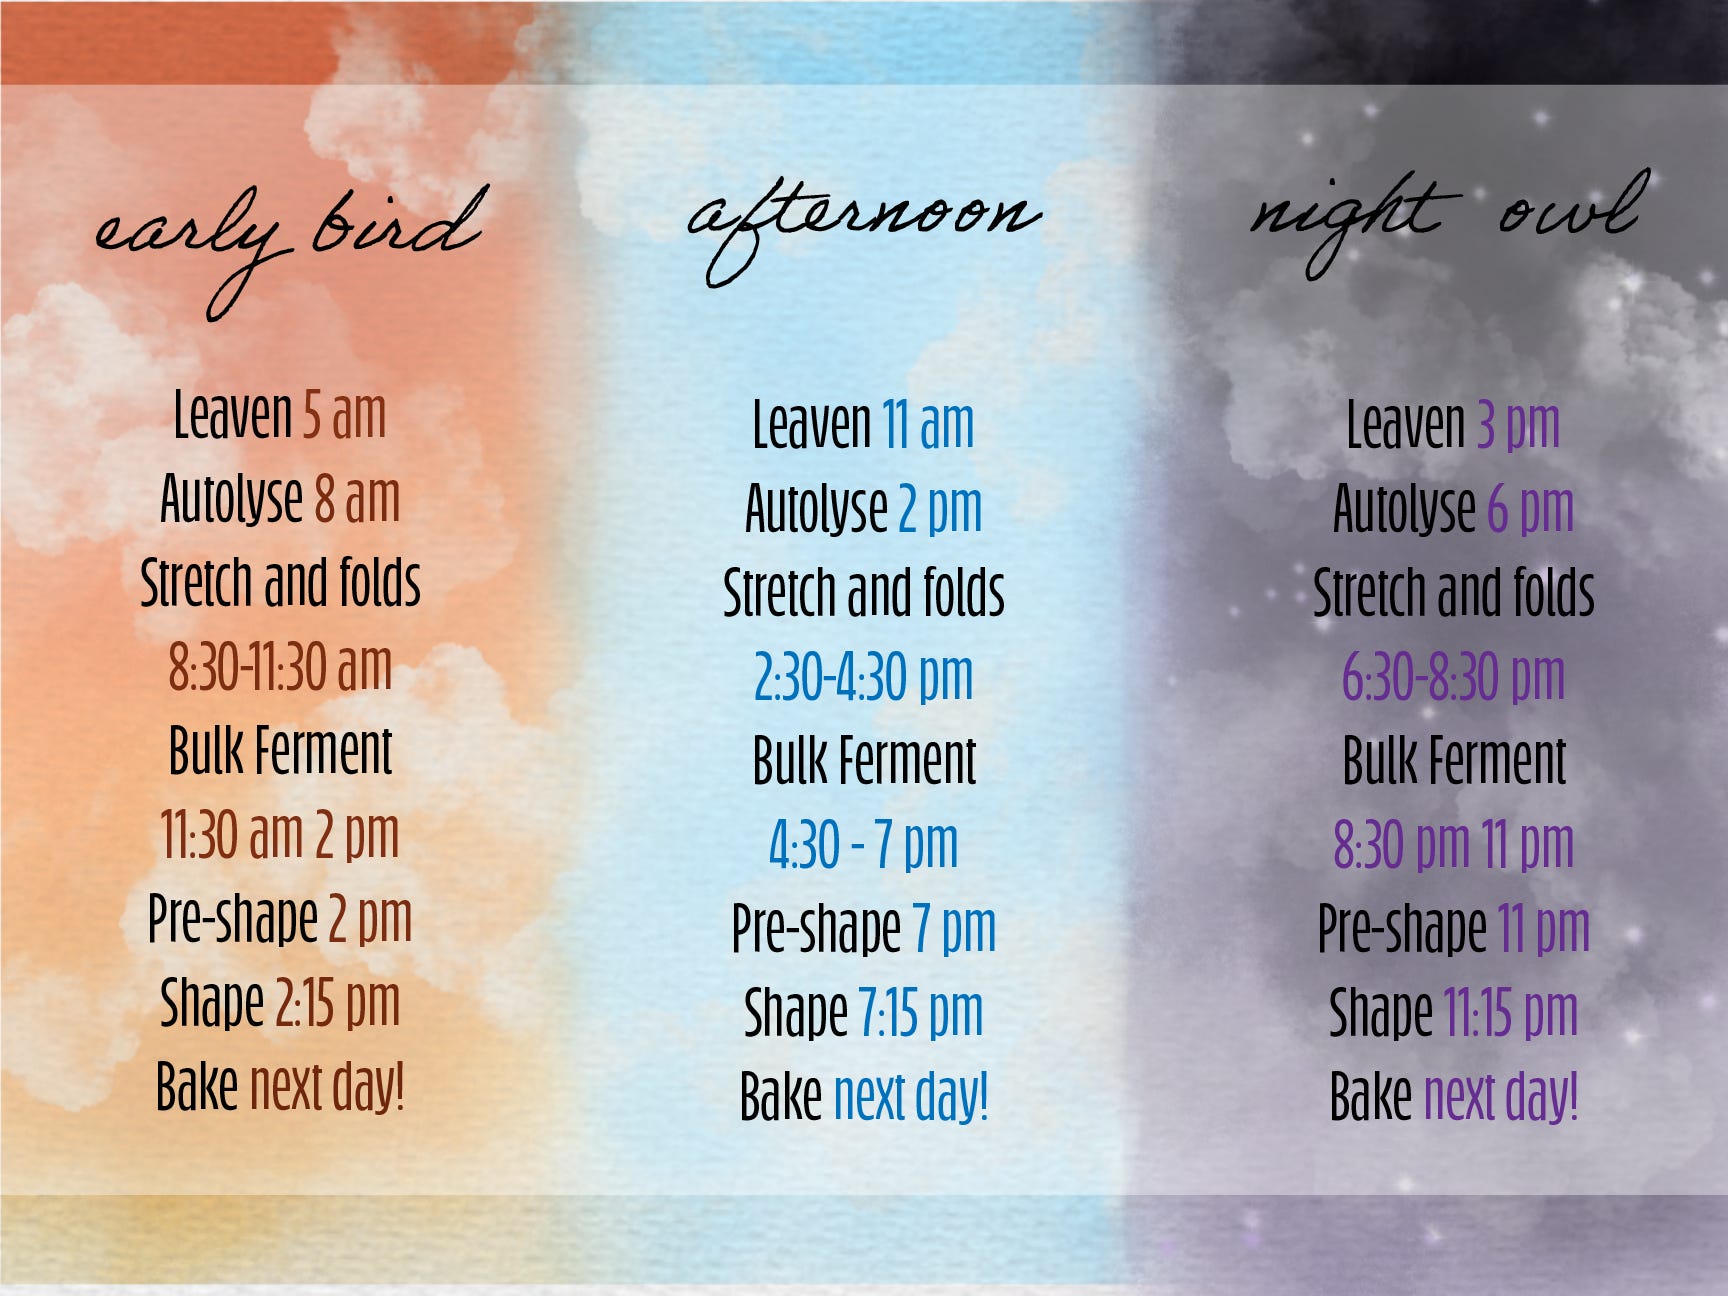
schedules
Most sourdough recipes, including the one above take two days to prepare and include a long overnight step. To make your life simple, I have prepared three schedule guides to adapt sourdough making to your life. Especially when you’re starting out, it is a good idea to start on the weekend or on a day that you’re working from home. Once you have established a routine you’re comfortable with, you should be able to bake any day of the week.
Final thoughts
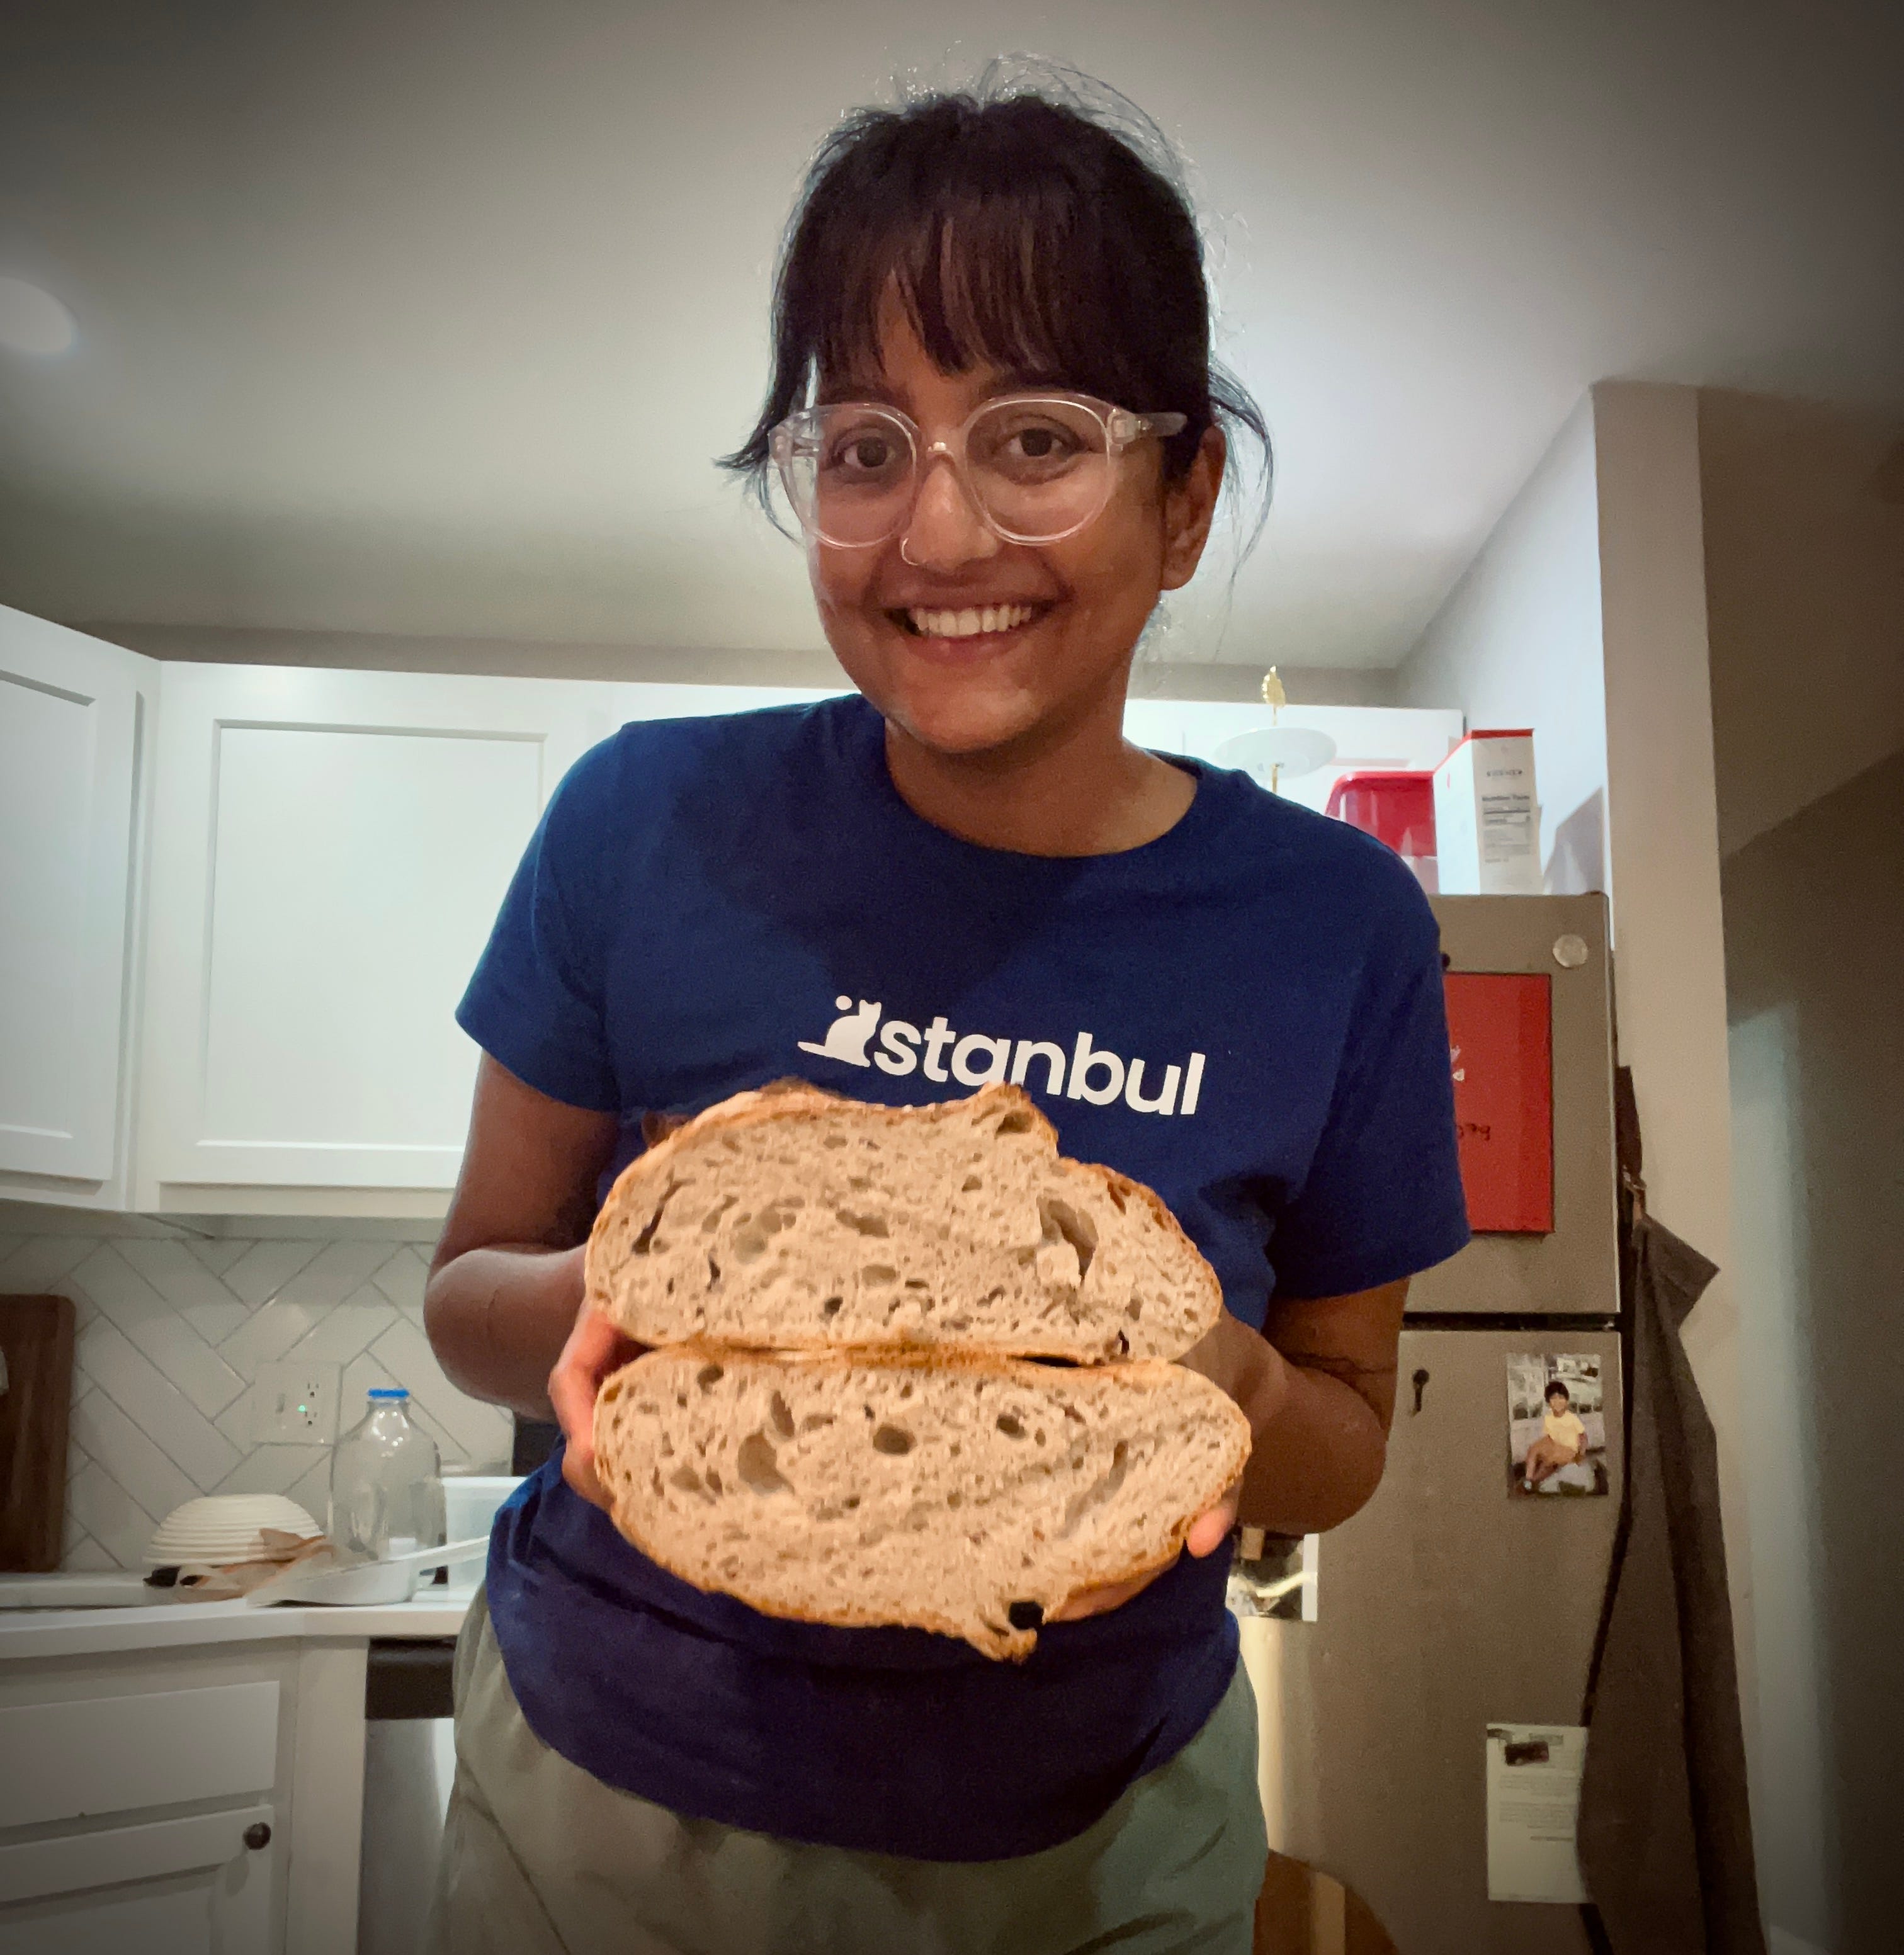
Because this post is already 300 years long, I will simply end with pictures of my favorite ways of eating sourdough bread. I hope you have a wonderful time baking!


While that tale may be more myth than fact, there’s solid evidence of bread baking in Ancient Egypt going back to the Neolithic era, including clay ovens, grinding stones, and even loaves found in tombs.
Tartine Bread by Chad Robertson is handsdown the best bread book ever! It is the only book I follow for any bread I make. This recipe is a variation of the tartine recipe for country loaf with modifications that worked well for me
I know that ovens are not a thing in many Indian households, even though they are becoming more common now. Unfortunately, I don’t know how you can bake bread without one - if you have an air-fryer this might be a reasonable substitute but I’ve never tried it.
Baking is a precise process and a food scale is very useful for most baked goods. So even though I do provide cup measurements, I highly recommend buying a food scale if you can.
A dutch oven is a cast iron pot with a lid that is oven safe. Even though you can bake without this, I consider the dutch oven to be an essential for sourdough because it provides the steam that is critical to ensure a good rise in your bread. If you choose to bake without one you could try to leave an oven tray with water or ice in your oven for the first 30 min of baking but I found this to be more cumbersome and less effective.
If you’re using cup measurments, salt is going to be a problem. I use diamond crystal kosher salt and my measurements are based on this. If you’re using standard table salt you will likely need much lesser of it (by volume) since kosher salt has large loose crystals as compared to standard table salt. If you’re using table salt, use 0.5 of the volume I suggested.
Loved it! To be honest I can't tell the difference between the initial 'bad' loaves and the latest ones. :P But having tasted your delicious sourdoughs I trust you. Also the facebook group story is hilarious haha, EVERYTHING is science XD
Homemade bread is the best!